How to open VMDK files on VMware
VMDK stands for Virtual machine hard disk This is a virtual hard disk that can be used on a virtual machine such as VMWare or Virtualbox. VMDK files are usually located on a site that shares a particular operating system.
Unlike the ISO file, which, when running on a virtual machine, needs to be installed first. In the meantime, if the user finds the VMDK file on the internet, most of the operating system it contains has been installed so it can be used right away.
In addition, the VMDK file as well have a large size, more or less up to 10 GB. But when it’s compressed it’s only around 2GB. In this article, users will learn to run the VMDK on VMware programs.
Also Read: How To Check The Health Of The Hard Drive On A Computer
Running VMDK files in VMware
The steps are actually the same as if you wanted to run an ISO file, but the difference is that here the user has to replace the installed virtual hard disk with the pre-existing VMDK file. For more information, see the tutorial below.
Open VMware and click
Create a New Virtual Machine.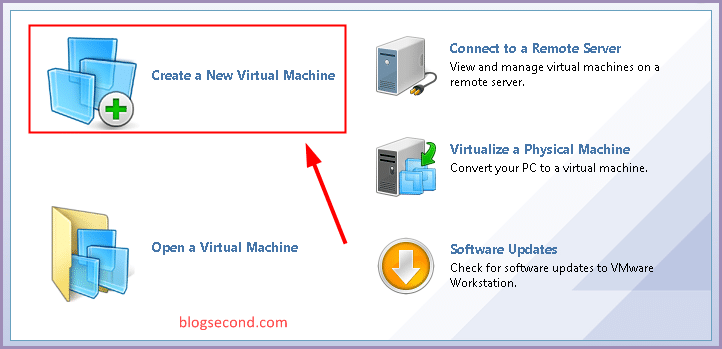
Select next
Typicaland press the Next button.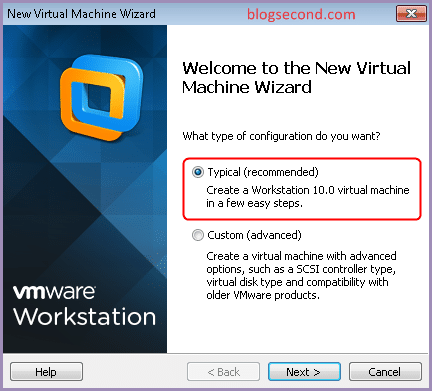
Choose an option
I will install the operating system laterand press the Next button.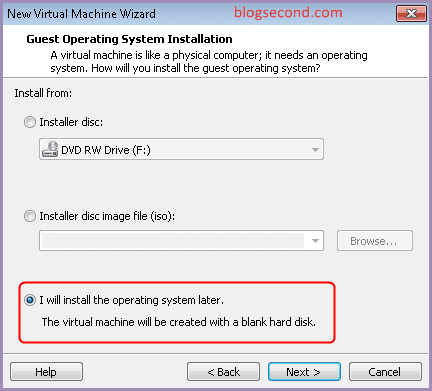
Now the user has to choose which operating system to use. here for example is Timeso i choose
LinuxhowOther Linux Kernel 3.xx.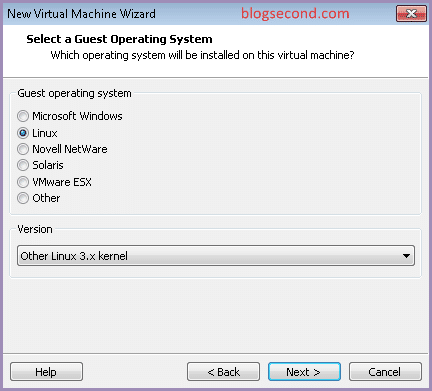
For directory names and storage locations, please set these as required. And as a suggestion, put it on a drive that has a large amount of free space.
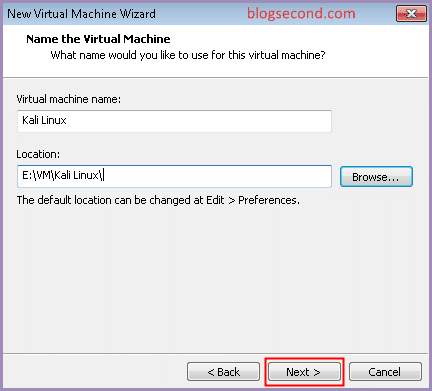
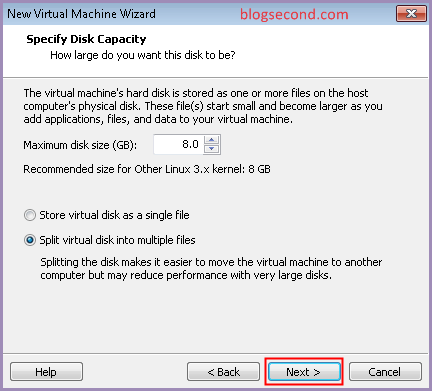
Leave the capacity set to 8 GB, as this virtual hard disk will later be deleted and replaced with a VMDK file.
Until finally clicks on the button
Finish.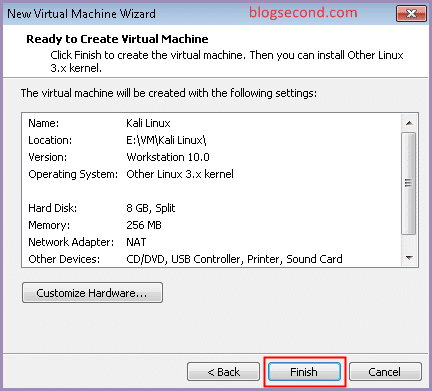
Now click on the menu
Edit virtual machine settings.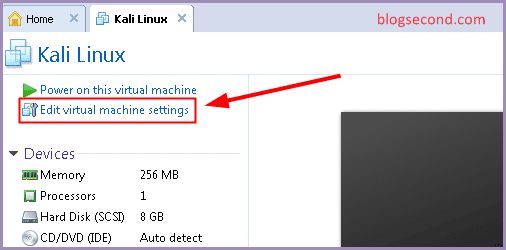
And click the button
Addwhat’s at the bottom.
Select menu
Hard Disk.
There are 3 options, please select the option
SCSI.
Again choose the option called
Use an existing virtual disk.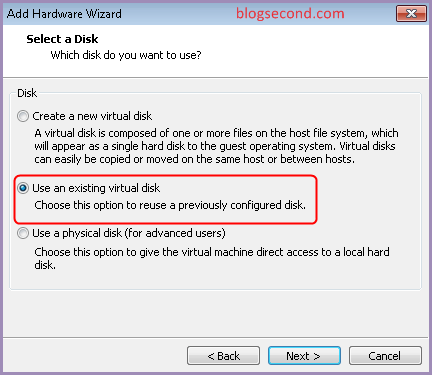
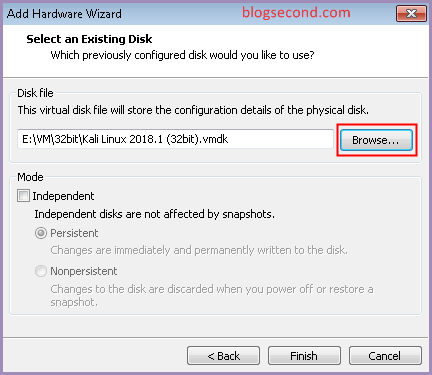
Until the end, the user can select the VMDK file here.
now click on the virtual hard disk
8 GBpreviously. Then click the buttonRemoveon the bottom.
Exit by pressing the button
OK. And done.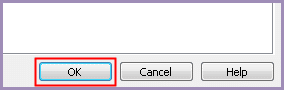
After following the steps above, the virtual machine is ready to use. Perhaps the above method looks very long, but in fact it can be done very quickly and in less than 10 minutes.
Also read: Remix OS: The Lightest Android Emulator for PC
diploma
Usually the VMDK file has its own settings and can no longer be changed, for example the hard drive capacity. Overall, all data is only saved in one file and not in several. This is fine, but it will grow a VMDK file later.
Hopefully useful and good luck