How to Reduce Photo Size on Windows 10 Laptop
 [Ilustrasi Oleh Pixabay]
Gadgetren – Sometimes for some reason we need to reduce the size of a photo. When applying online, for example, the company limits the size of the photos to be submitted.
Fortunately, resizing photos is pretty easy. Especially if the laptop you are using is running the Windows 10 operating system, as Microsoft, as the developer of this operating system, provides several integrated image editing programs.
For me, some of the standard editors provided are quite capable. In my opinion, some of them even have very comprehensive tools for combining images, adding text, or resizing them.
In case of resizing this image, I recommend using Microsoft Paint 3D. This application is a replacement version of Microsoft Paint with various improvements. You can use this tool to edit 3D images.
This is certainly very important for those of you who create designs and want to print them out with a 3D printer, or it can also be used to create objects on Facebook Spark AR when creating Instagram filters.
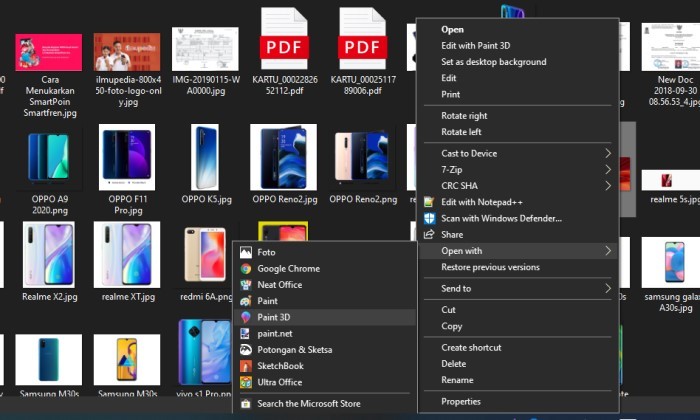
To resize photo using this application, you can open the folder where the photo you want to resize is saved. If so, right-click the photo and select Options Open with and choose 3D paint of the options displayed.
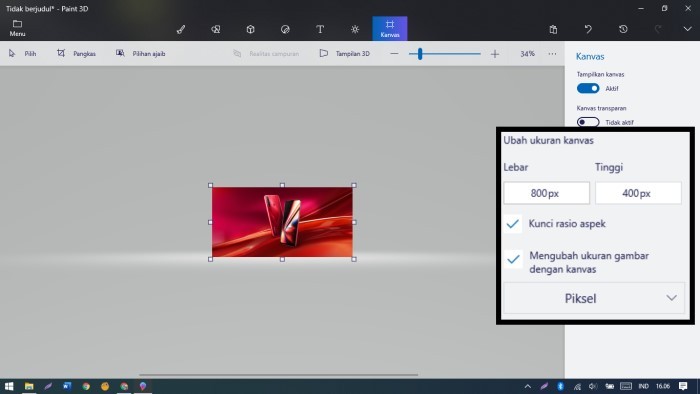
Wait a moment for the photo editing application to fully open. Next, select Menu Canvas with a square icon with the words “canvas” that appears when the cursor hovers over it.
Next, make sure you have the option “Aspect ratio lock” and “Change image size with canvas“This option is required to lock the aspect ratio so that the ratio doesn’t change when you change the width or height, but if you don’t need this option, you can skip it.
Then you can change the numbers in the column Far or Big according to the required pixels. To make changes, don’t forget to press the button Enter after you fill it with a certain number.
Now when you are done making the change you can press the button menu in the top left corner, then select the option Save as and choose an option image. Then select the desired location.
Give the column an appropriate name Filename and change the image type to Save as if needed. When you are done you can choose option. to press Save on computer to complete saving.
This method not only changes the photo’s pixel size, it also changes the photo’s file size. When the pixels (width or height) are decreased, the size of the photo file is also decreased. The reverse is also true.